[Japanese] [English]
[Sympa AMI > AMI setup proceduce]
Sympa AMI
AMI setup procedure
1. Launch instance from image
- On EC2 Dashboard, select ‘Image’ > ‘AMI’ in the left pane.
- Select ‘Public Image’ from the search box pull-down and enter AMI ID above.
- Select the image and under ‘Action’ select ‘Launch’.
- Create an instance and set the security group according to your requirements. Create the SSH key pair as necessity.
- Once the created instance has been started, select ‘Network & Security’ > ‘Elastic IP’ in the left pane and associate the IP address with the instance.
2. Initial configuration
-
Access to the instance via SSH. Note that the login user is ‘admin’.
-
Log in and a menu will appear.
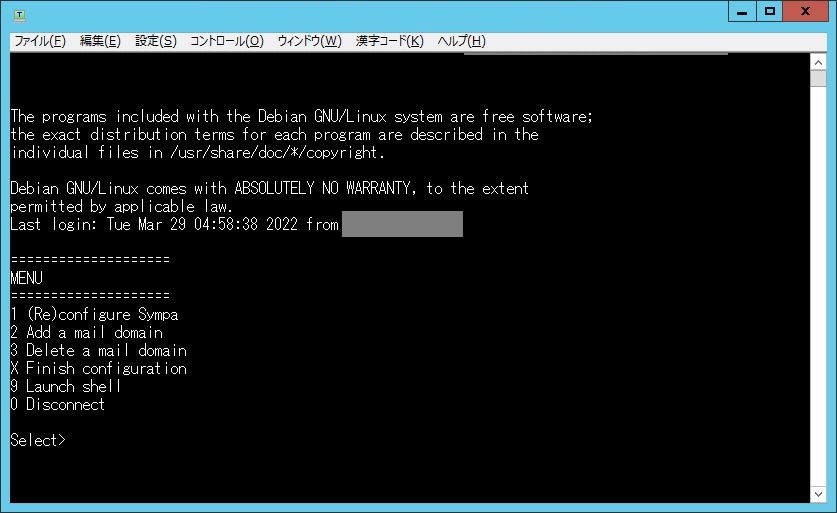
Select “(Re)configure Sympa”: Enter ‘1’ and press Enter.
Thereafter, perform basic configuration of the Sympa and related software.
-
Launch web browser and access to web UI. Follow “First login” link, input a listmaster address chosen on previous chapter, and then click “Send my password” button. According to description in the email sent to that address, choose the password.